


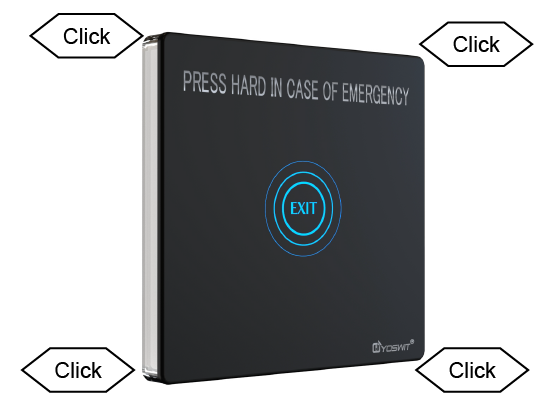
Smart Door Release Button with Break Glass Unit
Product Code: YO304 (R2W)
- Capacitive Touch Technology Replacing Mechanical Contact
- Touch and Touchless Modes
- Customize Door Hold Time Settings
- LED Indicator Reflecting Door Status
- Integration of Fire Alarm Input and Response
- Compatibility with Multiple Door Control Systems
- Central Hub for Smart Devices
- Bluetooth Mesh & WiFi Enhance Connectivity and Extend Range
Product Variant:
Template


Features


Run Your Home from Your Phone
Bluetooth Version
We use Bluetooth 4.2 (also sometimes referred to as Bluetooth Low Energy or BLE) as the core processor of our products.
Compatible Devices
We support all Smart Ready products with our application installed. Please click here to get the growing list.
iOS Support
We support iOS 13.0 or later.
Android Support
We support Android 7 or later.
| General | ||
| Product Name |
Smart Door Release Button with Break Glass Unit
|
|
| Model |
YO304 (R2W)
|
|
| Socket Type |
Socket 86
|
|
| Revision |
V7
|
|
| Compliance |
CQC, CE, FCC, RoHS
|
|
| Manufacturer |
Designed by Yoswit in Hong Kong, China / Assembled in Guangdong, China
|
|
| Dimensions | ||
| Product Size |


|
|
| Machine Standards | ||
| Shell Material |
Flame Retardant PC
|
|
| Storage Conditions |
-10°C to 40°C
|
|
| Operating Environment |
Interior
|
|
| Ingress Protection (IP) |
20
|
|
| Product Compatible |
Wi-Fi, Bluetooth Smart Products
|
|
| Frequency |
2.4GHz
|
|
| Wireless Output Power |
0-5dBm
|
|
| Connection Valid Range |
Open area: >50m / Interior: 3-20m
|
|
| Bluetooth Version |
V4.2
|
|
| Wi-Fi Protocol |
IEEE 802.11b/g/n
|
|
| Functional Specifications | ||
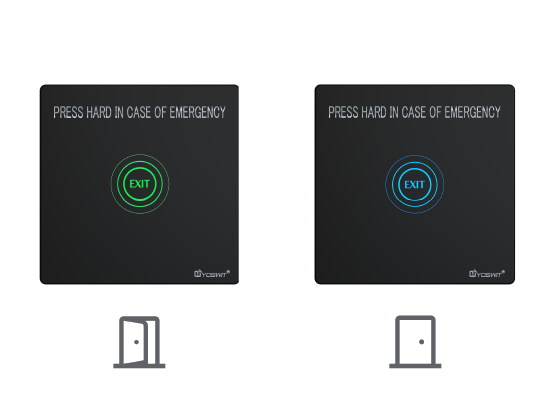
| Exit Instructions |
The color will change from blue to green and there will be a sound at the same time.
|
|
| Manual Door Opening Input |
Dry Contact Input (Normally Open State)
|
|
| Alarm |
LED Light Flashes & Buzzer Sounds
|
|
| Fire Alarm Input |
Supports triggering buzzer, alarm output, and unlocking. When triggered, the lock opens, the red light flashes, and the alarm prompts.
|
|
| Mechanical Switch |
Support mechanical door opening
|
|
| Alarm Output |
NC (Normally Closed) contact / COM (Common) contact / NO (Normally Open) contact: 30Vdc, max 1A
|
|
| Panel Indicator Light |
DHO, Fire Alarm, Power Failure
|
|
| Remote Control |
App
|
|
| Glass Breaking Function |
Tap the center of the product panel
|
|
| Comparison between infrared induction and capacitive induction | ||
| Factor |
Infrared sensor
|
Capacitive Sensing
|
| Heat Treatment |
Cannot be installed in vents (such as air conditioning)
|
Hot air movement does not trigger
|
| Daylight Effect |
Cannot be installed on the wall near a window
|
Will not trigger in sunlight environment
|
| Color Effect |
White paper can trigger
|
Will not be triggered by environment color
|
| Attenuation Effect |
Relying on infrared diodes to work, the sensing distance decreases by 0.5-1cm per year
|
No Attenuation
|
| Package | ||
| What's in the Box |

|
|
WARNING!
Disconnect Power
To prevent serious shock or electrocution, always disconnect the power at the service panel before installation. Only licensed electricians should carry out the installation.
Basic Installation
1
Remove the old switch and disconnect the wires, please make sure that there is about 5mm of bare wire exposing.
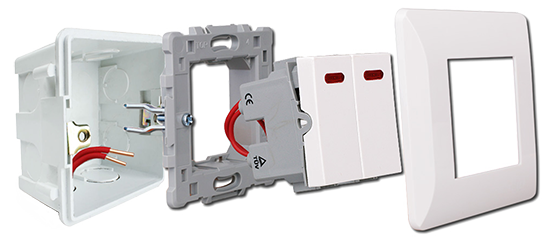
2
Insert a small, flat screwdriver into the notches on the wall plate and twist gently to pry it from the frame to remove the wall plate.
3
Connect the wires to the switch case. Make sure that the wires are secure.
Warning
To reduce the risk of electric shock, the unit shall be properly grounded in accordance with local regulations or codes. Failure to connect the ground wire will result in an unsafe installation that could lead to personal injury.

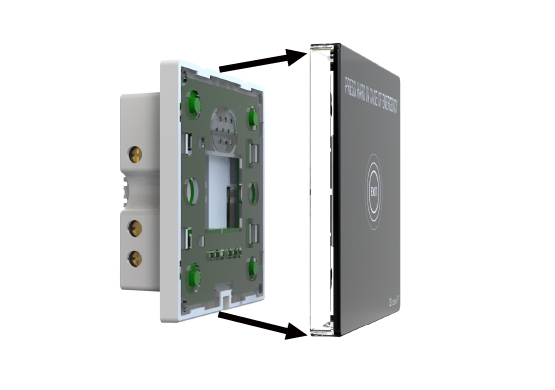
4
Fasten the switch on the wall by placing the proper wall mount components.

5
Turn on the circuit breaker and connect to the power.
6
Test your switch by tapping 2 to 3 times. Your lights will be on/off.
7
Snap the wall plate onto the frame. There are four click-stops for adjusting the fit of the wall plate to the switch and the wall.
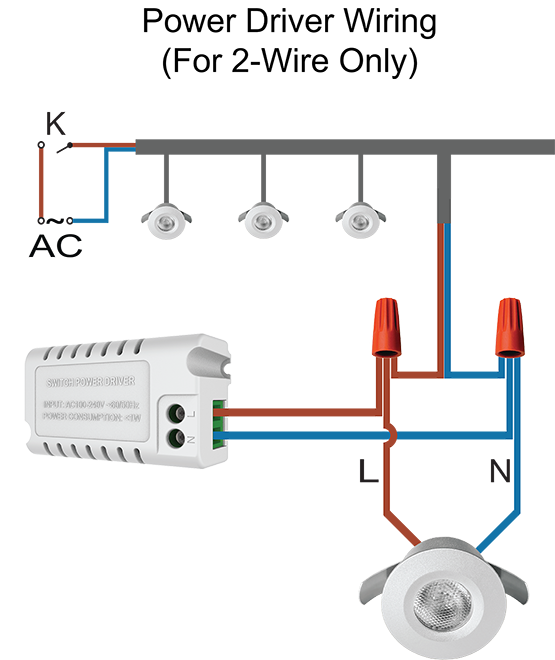
Installation - LED Power Stabilizer (Optional)
1
After 2-wire (without neutral wire) wiring, in case you encounter conditions of circuit instability, lighting flickering, or no light, you may (i) adopt 3-wire (with neutral wire) wiring method, or (ii) place the power driver at two ends of any one lamp as shown in the diagram below:
Installation complete.
Download the Yoswit App to your smart device and enjoy it now!
Yoswit will automatically detect the switch and add it to your device list.
| Downloads | ||
| Certification | ||
| User Manual | ||
| Data Sheet | ||
| Leaflet | ||
| Yoswit App |
|
|
| Yoswit App (Android Apk) | ||